
Matching replacement vinyl siding to existing clapboard profiles on historic and historic‑style Stoughton homes: trim, reveal, and installation strategies
Homeowners in Stoughton considering vinyl siding for a historic or historic‑style clapboard façade often ask a focused question: how do I choose a vinyl profile, reveal, and set of trim details that respect the original clapboard proportions while avoiding installation choices that trap moisture or harm existing trim? This article answers that question with practical design and installation guidance, explains why specific details matter for preservation and moisture control, and outlines the questions to ask contractors before you accept a proposal.
Primary service discussed: siding replacement and installation. Location focus: Stoughton homeowners evaluating options for historic and historic‑style exteriors. We assume the house has traditional horizontal clapboards or an older clapboard profile to match; we do not presume a full‑roof or window replacement is required. Where coordination with related trades matters, we point to relevant services and photographic examples.
why clapboard proportions matter
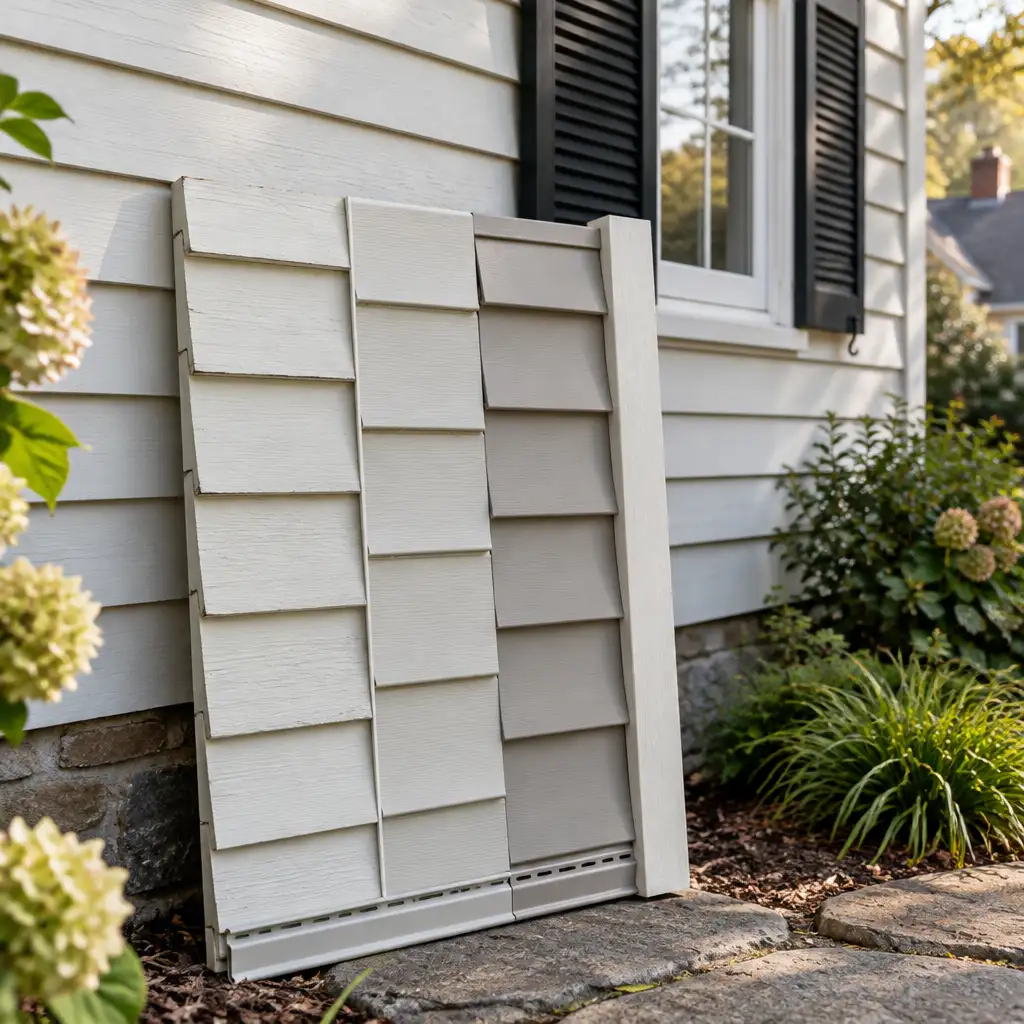
Clapboard siding is defined by a rhythm of horizontal courses, each with a face width, a reveal (the visible gap or shadow between courses), and often a subtle bevel or bead. On historic and historic‑style homes in Stoughton the visual scale — the height of each course and the depth of the shadow line — is part of the architectural language. If a replacement siding alters those proportions noticeably, the façade reads differently: the home can look more modern, heavier, or less refined.
Preserving or sympathetically replicating that rhythm does more than satisfy aesthetics. Proportions affect how joints line up with windows, how corner boards visually terminate, and how water sheds off each course. For example, a deeper reveal creates a stronger shadow line, which can make narrower boards appear thinner and more historically accurate. Conversely, selecting too deep a reveal in vinyl can concentrate water at laps if installation details are poor. A balanced approach respects the original look while ensuring modern moisture‑management practices are followed.
When you inspect a façade, measure three things: (1) the exposed face height of the existing clapboard, (2) the lap or overlap (how much the upper board covers the board below), and (3) any beading or decorative profile at the lower edge. These measurements are the start point for selecting a vinyl profile that will visually match, or intentionally differ in a controlled way.
vinyl profile options and what they replicate
Vinyl siding comes in a range of profiles intended to simulate traditional wood shapes. The common options and the historic looks they mimic include:
- Clapboard (straight lap) panels — these aim to replicate plain horizontal boards with a clean, shallow shadow. Face heights commonly range from 4″ to 7″; smaller faces are closer to many 19th‑century clapboards.
- Dutch lap — features a concave top edge that creates a distinct shadow and a more hand‑crafted appearance. A good choice when the original had a strong shadow line or when a middle ground between wide and narrow courses is desired.
- Beaded or cedar‑center profiles — include a faux bead along the lower edge that reads like a beaded clapboard; useful on Colonial Revival façades where a fine shadow at the bead reproduces historic craft details.
- Vertical boards and battens (less common for clapboard replacement) — sometimes used selectively on gable ends or additions to contrast the main clapboard elevation, but usually not appropriate when the goal is to match horizontal clapboards.
Choosing between these is not only aesthetic. Each profile has limitations: some vinyl panels sit flatter and require less back‑bending to seat on irregular sheathing, while others assume a flat substrate. Also consider available face heights — a 4″ face with a narrow reveal will read much more delicate than a 6″ face. For Stoughton homes that originally had narrow, tight clapboards, look for vinyl with a comparable face height and beaded details where present historically.
matching common historic widths
Historic clapboards often vary by era and region: early 18th–19th century examples may have narrower exposed faces, while later Victorian houses sometimes used wider boards. When the original boards are in place and in good condition, measure exposed face widths and lap proportions in several elevations (front, side, gable) because widths can vary across a house. A good installer will match the most visible elevation — usually the front façade — and use compatible widths elsewhere to maintain a consistent appearance.
trim choices and corner treatments
Trim and corner details are arguably more important than the siding panel itself for preserving architectural character. Traditional clapboard houses use corner boards, window and door casings, frieze boards under the eave, and returns at gables. Vinyl systems offer matching PVC or composite trims, but the visual depth and scale must be chosen carefully.
Key trim decisions include:
- Corner boards versus vinyl corner posts: Narrow wood corner boards (1 1/4″ to 3″) on historic homes create a crisp termination. Vinyl corner posts are wider and sometimes hollow; choose a solid‑look trim or a composite corner board sized to match original proportions. A slim corner board preserves the vertical line and prevents a bulky plastic look.
- Window and door surrounds: Preserve or replicate original casings where possible. If the original casings are sound, installing siding to fit under existing casings is often preferable. When casings must be replaced, select trim with the same face width and backband profile to keep the historical sightlines.
- Frieze boards and eave returns: These are important on Colonial and Greek Revival houses. Use trim materials that hold crisp mitres and shadows; PVC or primed composite with a painted finish can mimic the original if installed with tight joints and through‑fastening.
Avoid oversized vinyl J‑channels or wrap‑around corner posts that swamp fine trim details. A carefully chosen narrow trim can be painted to match window sashes and eave soffits for a cohesive look.
reveal and shadow‑line strategies
The reveal — the visible edge of the clapboard — controls shadow and perceived depth. There are a few strategies to match or recreate an appropriate shadow line with vinyl:
- Match existing exposed face height: The most straightforward approach is to pick a vinyl face height equal to the measured exposed face of the existing boards. This preserves course rhythm and aligns window sills and door heads visually.
- Use beaded or cedar‑center profiles: If the house originally had a bead or decorative lower edge, choose a vinyl beaded profile that recreates that thin shadow at the lower edge. This gives a convincing historic appearance even when the body board is slightly wider.
- Adjust reveals at corners and openings: Slightly varying the reveal near corners, window heads, or water tables can mask minor mismatches in course height. This requires planning so horizontal lines remain visually consistent across elevations.
- Custom trim to create shadow lines: In some cases, we add a thin backband or cove trim above boards to create a deliberate shadow line that more closely resembles original clapboard relief.
When altering reveal depth remember the functional consequences. A deeper reveal can create a more dramatic shadow but also puts more of the lap overlap exposed to driving rain. That is manageable with appropriate flashings, capillary break details, and correctly installed starter courses, but the installer must understand the tradeoffs.
starter courses, sill details, and bottom terminals
The bottom termination of siding deserves careful attention. Common problems we see with poorly executed projects are trapped water at foundation transitions, inadequate clearance at grade, and missing or improperly installed starter courses that allow moisture to migrate behind siding.
Good starter and bottom details include:
- Starter strip with capillary gap: A purpose‑made starter channel that leaves a small capillary gap between the lowest siding course and the sheathing or framing helps drainage and prevents wicking. It also sets the first course at the correct reveal to align subsequent courses with window sills and other features.
- Sill flashings at water tables and porch connections: When siding terminates above a projecting trim or water table, a metal sill flashing or a flexible sill pan lined underneath the trim prevents water from soaking the wall behind the water table. On historic homes with projecting moldings, the flashing must be concealed and compatible with the moulding profile.
- Proper clearance to grade and porches: Maintain the recommended clearance from finished grade or porch surfaces to the lowest siding course to avoid splash back and termite/rot issues on underlying wood framing.
In Stoughton’s climate, freeze‑thaw cycles and snow on porches make clearances and drainage details especially important. A good installer will mark the starter course against existing window sills so horizontal lines match the original composition.
moisture management and flashing principles
Matching profiles is important, but never at the expense of moisture control. Vinyl siding is not a watertight barrier — it’s a cladding designed to shed bulk water while allowing the substrate and wall assembly to control vapor and occasional moisture penetration. Sound moisture management reduces the risk of rot, paint failure on existing trim, and trapped damp that can accelerate deterioration.
Key principles are:
- Continuous weather‑resistive barrier (WRB): Confirm the wall has an effective housewrap or felt that’s lapped and sealed at penetrations. When re‑siding, the installer should replace or repair WRB as needed and properly flash transitions to openings and rooflines.
- Integrated flashing at windows, doors, and sills: Step flashing and head flashings must be installed over the WRB and lapped correctly beneath siding. Vinyl manufacturers’ trim pieces are not substitutes for metal flashings at critical junctions.
- Ventilation and capillary breaks: Use a drainage gap system or furring channels behind the vinyl when the substrate is irregular or old sheathing may retain moisture. These create a ventilated plane that helps drying and prevents capillary action at the lap.
- Avoid trapped trim details: Do not wrap siding tightly behind existing unvented trim that obstructs airflow at the cavity. If original trim is being retained, the installer should create pressure relief and flashing details to allow any incidental moisture to escape safely.
Practical example: if you have original wood window casings that you want to keep, the siding should be terminated at the edge of the casing or fitted under it with a thin backer that preserves a small drainage plane behind the siding. Where casings are removed, replace them with rot‑resistant materials and include flashings that integrate with the WRB.
installation techniques to preserve character
Beyond material selection, installation technique defines the final appearance. Experienced installers use a combination of layout planning, measured setup, and selective retention of original elements to maintain scale and detail.
layout and course control
Start by laying out the courses from the most visible elevation. Using the front façade as the control, set the starter so that window sills and door heads align to the same course number where practical. On asymmetrical façades or those with tall entries, installers sometimes use a small reveal adjustment at the foundation or soffit to keep the visual lines continuous.
retaining original trim
When original trim is sound, we advise retaining it. Siding can be installed to fit under existing trim or to butt against it with sealed joints and flashings. Retaining original wood casings preserves depth and paint textures that vinyl trim cannot convincingly reproduce.
fastening and thermal movement
Vinyl expands and contracts with temperature; fastener placement must allow lateral movement. Overdriven nails or screws restrict movement and cause buckles, while under‑fastening leads to loose boards. Installers should follow manufacturer guidelines: leave a small shank‑to‑hole clearance and use spiral‑shank fasteners or hot‑dip galvanized nails sized for the substrate. For historic façades, good fastening practice preserves even sightlines across long wall runs rather than allowing undulating boards to distort profiles.
field modifications and replication methods
Sometimes no off‑the‑shelf vinyl exactly matches an existing clapboard. A few field strategies help bridge the gap:
- Custom trim and backbanding: Add a slim backband or beaded trim above or below selected courses to reproduce historic sightlines. Backbanding is especially useful at window heads and water tables.
- Mixing profiles where appropriate: Use a narrower face on the front elevation and a slightly wider profile on less visible sides to balance stock availability and appearance. Keep course heights coordinated at corners and returns to avoid a mismatched look.
- Staggering joints and aligning reveals: Where panels meet, careful staggering avoids repetitive patterns that draw the eye. Aligning lap lines with architectural features such as belt courses or cornices reduces visual mismatch.
- Partial retention and overlay: If original clapboards are in reasonable condition but too thin or brittle to remain exposed, installers can leave them in place as a secondary substrate, installing a WRB over them and then adding vinyl. This preserves an older surface profile and can reduce waste, but the condition of the underlying sheathing must be verified to avoid trapping rot.
All field modifications should be discussed with the homeowner before work begins. Some visual compromises are reversible; others are permanent alterations to historic fabric.
coordination with windows, doors, and rooflines
Siding does not exist in isolation. Windows, doors, gutters, and roof edges intersect siding lines and must be considered when setting course heights and choosing trim. A few coordination points:
- Window head and sill alignment: Try to align lap lines with window sills on primary elevations. This reduces the number of partial boards and maintains a continuous visual rhythm.
- Door thresholds and porch roofs: Pay attention to porch eaves and roof overhangs; water dripping from a porch roof onto siding below is a common source of staining and moisture penetration. Proper flashing and drip edges at these intersections are essential.
- Gutter and downspout integration: Locate downspouts to avoid interrupting primary clapboard courses. Where a downspout must cross a run, use neatly installed flashings and trim to maintain visual continuity.
When replacement windows are part of the plan, sequence work so rough openings and flashings are completed prior to siding. If windows will remain, but casings are repaired or replaced, confirm the planned method for terminating the siding under or against casing profiles.
selecting an installer and what to ask
Choosing an installer is a decision about both craft and moisture management. For historic or historic‑style homes in Stoughton, ask potential installers these specific questions:
- Can you provide examples of siding projects where you matched or sympathetically replicated clapboard proportions? Request to see photographs in a gallery rather than relying only on memory. (A relevant place to browse is our siding project gallery.)
- How will you set the starter course on my front façade to maintain alignment with window sills and door heads? Ask for a drawing or marked photo showing proposed starter placement.
- What WRB and flashing details do you use at windows, doors, and roof intersections? Look for answers that include step flashing, head flashing, and WRB laps rather than reliance on vinyl trim alone.
- Will you retain existing trim where possible, and if replacement is required, what materials and dimensions will you use? Confirm you’ll receive trim samples or dimension details for approval.
- How will you manage thermal movement and fastener spacing for the selected profile? Expect detailed fastening schedules rather than vague assurances.
Also check that the installer will inspect and report the condition of sheathing and framing visible during siding removal or test openings. Wall repairs and localized sheathing replacement are common on older homes, and addressing them before installing a new cladding saves future problems.
project sequencing and inspection checkpoints
Sequencing affects both appearance and durability. A recommended sequence for a typical vinyl re‑siding on a historic clapboard house is:
- Pre‑project site review and measurements, including photos of trim details and course heights.
- Selective removal of problem clapboards, inspection of sheathing, and repair planning. If existing trim will be retained, inspect and document its condition.
- Installation or repair of housewrap/WRB and any sheathing replacement required.
- Flashings at windows, doors, rooflines, and water tables integrated with WRB.
- Set starter courses and lay a single elevation’s initial courses to confirm reveal and alignment with owner approval.
- Full siding installation, trim application, and finishing of joints, mitres, and paintable surfaces.
- Final inspection walkthrough with the homeowner, checking course alignment, reveal consistency, flashing visibility, and drainage clearances.
Checkpoints for the homeowner include: confirming starter course placement, inspecting flashings before siding covers them, and reviewing trim samples. Insist on a walkaround with the crew leader after siding is complete to address any visual alignment issues while crews are still on site.
material selection, colour, and perception of depth
Colour and finish change how profiles read. Lighter colours reflect more light and reduce the apparent depth of the reveal; darker colours deepen shadows. If your goal is to echo an historic painted clapboard, choose a painted‑trim colour palette and a vinyl shade that complements it. Remember vinyl colours fade slowly; contrast between siding and trim often helps the trim read like wood.
Two additional considerations:
- Texture: Some vinyl has a woodgrain emboss that can help mimic painted wood; others are smoother and read more modern. On historic houses a subtle grain often looks more convincing.
- Matte versus gloss: Vinyl has a slight sheen; very glossy finishes are rare. For a more authentic appearance, avoid very dark, high‑gloss colours that exaggerate thermal movement and may draw attention to lap lines.
Bring paint or colour chips from the house when viewing vinyl samples. View samples in daylight on the façade at a similar scale to judge how reveal and colour read at a distance.
maintenance, repair, and long‑term considerations
Vinyl is lower maintenance than painted wood, but it’s not maintenance‑free. Plan for periodic inspection of flashings, caulks, and vertical trim seams. Common maintenance tasks include:
- Cleaning to remove dirt and biological growth every few years with a mild detergent and soft brush.
- Inspecting caulked joints, window terminations, and penetrations annually and renewing sealants where they crack or pull free.
- Repairing damaged panels promptly; many installers keep extra stock for color matching and replacement.
From a preservation standpoint, document existing trim before work begins. Photographs and measured drawings of cornices, moldings, and window surrounds ensure replacements can match original profiles if repairs are later required. If you anticipate future restoration to painted wood, choose reversible installation techniques where feasible (for example, installing new trim that can be removed without damaging original framing).
conclusion
Matching vinyl siding to clapboard on a historic or historic‑style Stoughton home requires balancing visual fidelity with modern moisture management. Start with careful measurement of existing clapboard face heights and bead details. Choose a vinyl profile and trim that match those proportions, and prioritise installation details — starter courses, flashings, WRB continuity, and fastening techniques — that protect the underlying structure.
Where the original trim is sound, retain it and build the new cladding to integrate with those details. Where replacement is necessary, select painted‑finish trim with matching widths and backbands to preserve shadow lines. Expect the installer to lay out courses from the most visible elevation and to provide a plan showing starter placement and flashing details. Finally, review material samples on the house so colour and texture read as intended from the curb.
If you’d like to review siding options or to discuss how we would approach a specific Stoughton property, our team can walk through the key measurements and installation priorities with you and provide a written plan that balances preservation and modern building science. For visual examples of siding work and to compare profiles, see our siding project gallery and read more about our approach on the siding repair, replacement and installation page.
frequently asked questions
Q: How closely can vinyl match historic bead details and narrow clapboard widths?
A: Vinyl manufacturers offer beaded and narrow face profiles that can approximate historic details closely, especially when combined with slim backband trim. Exact matches for very old custom mouldings may require custom trim or composite replacement pieces, so measure existing profiles and discuss sample mockups with your installer.
Q: Will installing vinyl siding over existing wood clapboards hide rot or structural problems?
A: Proper practice is to inspect and repair sheathing and framing before installing new siding. Leaving deteriorated clapboards or rotten sheathing in place can trap moisture and lead to further damage. A qualified installer will open select areas to confirm substrate condition and propose repairs if necessary.
Q: Can I keep my original wood window casings and still install vinyl siding?
A: Yes. Retaining original casings is often the best way to preserve historic character. Siding can be installed to fit under casings or abut them with appropriate flashing and a small drainage plane so the casings remain ventilated and protected from trapped moisture.
Have questions about your home’s exterior? Boss Services, Inc. can help you consider the next step. Contact our team, call 508-297-0635, or email bossservicesinc@comcast.net.