
Preserving custom architectural trim during a siding replacement: a North Easton, MA preservation-minded approach
How can I replace siding without losing original decorative trim on my older house? This guide helps North Easton homeowners evaluate and protect architectural trim and moldings when planning a siding replacement. It explains how to document details, when temporary removal and careful storage make sense, which subcontractor skills matter, how to choose between repair and replication, and how to match the trim’s look while upgrading moisture control and wall performance. The primary service involved is siding replacement and trim preservation planning.
Why historic and custom trim matters
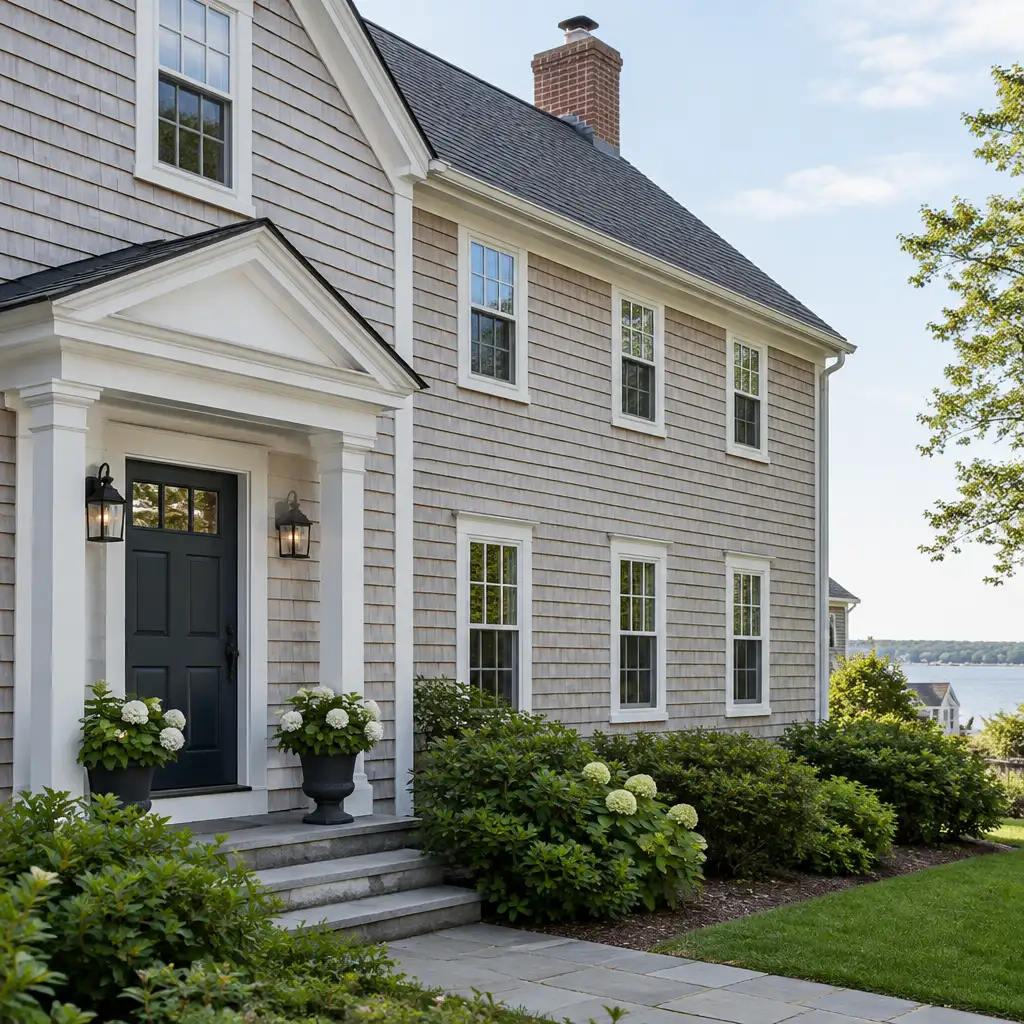
Custom architectural trim—cornices, wide corner boards, window crowns, column caps, eave returns, and decorative brackets—shapes a house’s character. In North Easton many older homes display these features, and they are often the details that define curb appeal and architectural intent. Preserving trim isn’t only about looks; it preserves workmanship, original proportions, and historical intent while retaining the building’s visual rhythm when new siding is installed.
From a practical standpoint, trim also affects how siding integrates with openings and rooflines. Trim profiles create shadow lines and cover transition points where flashing, housewrap, and siding starter channels meet. If trimmed improperly during a siding project, you risk visible gaps, water intrusion opportunities, or mismatched sightlines that undermine both appearance and moisture protection.
Pre-project documentation: photograph, measure, and record
Before any material is removed, document every trim element thoroughly. Good documentation gives the installer a clear reference and protects historic detail during storage or replication. Take time to create a traceable record covering the whole exterior and each trim feature you want to keep.
At minimum your documentation should include:
- High-resolution photographs of each elevation and close-ups of trim profiles, corner junctions, returns, fastener patterns, and any maker’s marks.
- Measured sketches of trim profiles and widths—note depth from the plane of the wall, reveal distances, and stacked layers where present.
- Annotated notes about paint layers, finish condition, and any existing repairs that are visible.
- Location numbering: assign each removable piece a number or code and photograph its placement so reinstallation is straightforward.
We recommend taking photographs both perpendicular to the trim (to capture profile) and at low oblique angles (to show how shadow and depth read on the façade). If you’re uncertain how to document profiles, ask the contractor during the estimate whether they include measured sketches and profile tracings in their scope.
Condition assessment: what to look for
Not every piece of trim can or should be preserved in place. A careful condition assessment separates what’s repairable from what risks causing future moisture problems. A qualified contractor will inspect trim for five key factors:
- Material integrity: Is the piece solid wood, engineered trim, or PVC? Wood can often be repaired; PVC tolerates moisture but may have different attachment needs.
- Rot and insect damage: Localized soft areas or deep rot at bottoms and returns are common. Small rot patches are often repairable; widespread decay usually requires replication.
- Fastening and attachment: How is the trim fastened to the sheathing and framing? Trim nailed only into sheathing may need greater attachment when reinstalled over new sheathing or housewrap.
- Underlying sheathing and flashing: Trim condition can mask failing flashing or compromised sheathing. If sheathing replacement is likely, removal of trim is safer.
- Paint and finish condition: Multiple failing paint layers can trap moisture. Preserving trim often includes planing back, priming, and repainting.
Contractors will typically use visual inspection and simple probe tests—no invasive demolition at this stage. If moisture or hidden rot is suspected, controlled removal of a small trim section to inspect sheathing is reasonable; discuss any exploratory steps with your estimator and request that they document findings and recommended next steps in writing.
Temporary removal and storage: when and how
Temporary removal is a common preservation strategy when you want to keep original woodwork intact while replacing siding or repairing sheathing. It’s labor-intensive but can be cost-effective for high-value trim. Consider temporary removal in these situations:
- Trim obstructs safe sheathing replacement or flashing upgrades.
- Trim covers complicated transitions (e.g., between two siding materials) that require precise flashing work.
- Trim has architectural significance or unique profiles that are difficult to replicate accurately.
Best-practice removal and storage include these steps:
- Label each piece: Number pieces on the exposed back face with non-damaging marker or removable tags and photograph the piece in its installed position with the number visible.
- Document attachment points: Note nail patterns, hidden blocks, and corner returns so reinstalling recreates original joins and reveals.
- Protect surfaces: Wrap wood pieces in breathable sheeting (not plastic) with padding along edges. Storing in a dry, level, indoor space prevents warping.
- Store flat where possible: Long crown moldings and cornice pieces should be supported across multiple points or stored upright in racks to preserve profile shape.
- Create a reinstall plan: Numbered crates, a labelled map, and a reinstallation checklist reduce confusion when the siding is finished.
Important limits and cautions: If a trim piece is already extensively decayed, removal may cause it to fall apart. Discuss with your contractor whether partial repair before removal is safer. Never assume temporary removal will be cheaper; handling, detailed label-and-map work, and climate-controlled storage add labor and space costs.
Repair versus replication: decision criteria
Deciding whether to repair original trim or to replicate it in new materials is part preservation judgment, part cost analysis, and part moisture-risk management. Use these criteria to guide the decision:
Preserve/repair when:
- The piece is largely sound, with limited localized rot or surface deterioration.
- Wood grain, joinery, or maker’s tooling marks are historically significant or unique to the house’s character.
- The underlying sheathing and framing are in good condition, or the contractor can access those areas without further removal.
- Budget allows for careful conservation steps (stripping, epoxy consolidation, dutchman repairs, priming, and repainting).
Replicate when:
- Trim is extensively decayed, delaminated, or insect-damaged in ways that compromise structure or profile.
- Replacement sheathing or continuous water-control upgrades require removal for safe installation.
- Original material dimensions preclude secure reattachment without excessive retrofit framing.
- Long-term maintenance reduction is a priority and modern materials (rot-resistant primed wood or cellular PVC) offer desirable life-cycle benefits.
When replication is selected, decide on three things: material, profile accuracy, and finish. Materials range from clear pine or mahogany for historically accurate replication to engineered primed finger-jointed pine or cellular PVC for lower-maintenance results. Ask for a sample section or a mockup before committing—seeing a small test piece installed and painted helps confirm visual match.
Visual-matching strategies for profile, scale, and finish
A convincing visual match requires more than copying widths. Look for these visual cues when matching trim:
- Profile depth and shadow lines: The thickness and offset of each moulding define shadows at different times of day. Replicated trim often appears flatter if depth isn’t matched; profiles must reproduce both face shape and thickness.
- Edge radii and tooling marks: Original mouldings may have subtle rounded edges from hand or older milling tools. Modern router-cut pieces can be finished to reproduce those soft edges.
- Layering and reveal: Many historic trims stack smaller mouldings above or below larger boards. Maintain those reveals rather than substituting a single wider board when possible.
- Paint sheen and colour: Correct paint sheen affects apparent depth. For preserved wood, consider oil- or alkyd-compatible primers and topcoats to match historic finishes; modern acrylics can work on primed new trim if specified correctly.
A practical approach: request a small mockup area where new siding meets either preserved or replicated trim so you can view how shadow, reveal, and colour interact at the scale of the house. If a mockup isn’t possible, ask for a painted sample mounted to a sheet of sheathing and viewed from 20–40 feet, the typical viewing distance for curb appeal.
Integrating trim preservation with moisture-control upgrades
One of the common tensions in preservation-minded siding work is between keeping historic trim in place and upgrading the wall to manage moisture. Good projects do both: preserve visual elements while addressing water management at the substrate level.
Key integration items to confirm with your contractor:
- Continuous water-resistive barrier: New housewrap, sheathing membranes, or peel-and-stick flashings must be lapped and integrated behind trim locations. When trim is preserved in place, the contractor should detail how flashing will be installed and sealed—sometimes that requires temporary removal of trim at critical junctions.
- Flashing at horizontal transitions: Wherever saddle flashings, head flashings, sill pans, or step flashings meet trim elements, ensure proper butt-and-lap sequences that shed water to the exterior without trapping it behind a profile.
- Mechanical attachment through new WRB: If trim is reattached over a new barrier, confirm the fasteners will penetrate to sound blocking or framing to prevent movement without compressing the WRB in a way that compromises continuous drainage.
- Back-blocking or furring where needed: When replicating trim in thicker materials or fitting over thicker siding, back-blocking creates a stable nailing substrate and preserves original sightlines.
In short, preservation work should never prevent an otherwise required moisture-control upgrade. If keeping original millwork in place means skipping important flashing, the right choice may be temporary removal and reinstallation so modern WRB and flashing details are installed correctly.
Project sequencing and timing
Sequence matters. A clearly planned order reduces damage risk and ensures visual outcomes match expectations. A typical preservation-aware siding sequence looks like this:
- Initial inspection and documentation (photos, sketches, and removal plan for identified pieces).
- Small exploratory removals only where needed to check sheathing and hidden flashing.
- Careful removal and labelling of pieces scheduled for temporary storage, with protective wrapping and inventory.
- Sheathing and WRB upgrades—replace rotten sheathing, install housewrap/peel-and-stick flashings, and complete window/door flashing transitions.
- Install new siding to finished heights and lines, leaving attachment provisions for trim reinstallation.
- Reinstall preserved trim or install replicated pieces; apply sealants sparingly at joints where required to keep drainage paths open.
- Finish carpentry and paint—perform priming and finish coats after reinstallation when feasible, or use prefinished pieces installed with touch-up primer on cut ends.
Timing of paint and finish is an often-overlooked decision. Painting trim before reinstallation avoids drip or masking adjacent new siding but may complicate final touch-ups at joints. Painting in place allows a single coordinated finish, but requires protected drying windows and careful masking during siding installation. Talk through preferred sequencing with your contractor to set expectations and reduce delays.
Subcontractor skills and questions to ask
Preserving trim requires specific skills. When vetting contractors or subcontracted finish carpenters, ask targeted questions:
- Experience with historic trim: Ask for examples of preservation-minded siding work or close-up photographs showing removed and reinstalled trim. Do not request unverifiable customer stories; instead ask to see photographic documentation of similar-detail work (they can show generic portfolio images).
- Carpentry skills: Look for finish carpenters who can perform dutchman repairs, scarf joints, and accurately reproduce moulding profiles. Millwork experience and a willingness to create a small test piece is a positive sign.
- Protection and storage plans: Who will handle the removed pieces, where will they be stored, and how will they be protected from temperature and humidity swings?
- Flashing and WRB coordination: Confirm there is a plan for integrating the preserved trim with the WRB and flashing sequence, including who is responsible for cuts and fastener locations that preserve drainage.
- Mockup requests: Will the contractor build a small mockup area to show how new siding and reinstalled trim will look together?
When subcontracting millwork, prefer teams that are comfortable with both site adjustments and shop work. An exact millwork-matched section produced in a shop and fitted on-site generally yields the best visual continuity and faster installation with lower call-backs.
Budget considerations and practical tradeoffs
Preserving original trim often costs more in labor than wholesale replacement, but the decision rests on value judgments—not just dollars. Consider these budget drivers and tradeoffs:
- Labor intensity: Careful removal, labelling, and reinstallation require time. Shipping or climate-controlled storage adds cost if the contractor doesn’t have local space.
- Repair costs: Epoxy consolidations, dutchman repairs, and finish carpentry can be more cost-effective than full replication for limited damage.
- Material longevity: Replication in cellular PVC or rot-resistant wood can reduce future maintenance costs; factor long-term repainting intervals into your decision.
- Risk of hidden damage: When removal reveals extensive sheathing or framing problems, a preservation plan can escalate into a larger structural repair project. Budget contingencies help avoid surprises.
Ask contractors to separate costs for optional preservation steps on estimates: an itemized line for temporary removal and storage, another for repairs to preserved pieces, and a third for replication so you can make an informed choice when the work begins.
A practical checklist to bring to estimates
Use this short checklist when you request estimates for siding work in North Easton. It focuses the conversation on preservation outcomes and technical coordination:
- Provide photographs and notes of trim elements you want to preserve; ask whether the estimator will create measured profile tracings.
- Ask whether small exploratory removals are included to inspect sheathing and flashing where trim covers transitions.
- Request a written plan for any temporary removal, labelling, storage method, and reinstallation sequence.
- Confirm how the contractor will integrate housewrap and flashing with preserved trim—identify the person responsible for flashing details in writing.
- Ask for options and pricing for repair versus replication and for material recommendations (primed wood, finger-jointed, cellular PVC).
- Request a mockup or sample piece for approval when profile replication is needed.
- Confirm painting sequence and who is responsible for final finish quality and touch-ups.
Closing steps and next actions in North Easton
If you decide to move forward, plan a pre-construction meeting that reviews the inventory, removal and storage plan, and the reinstall checklist. During this meeting, make sure the estimator provides a written scope that separates preservation tasks and identifies who signs off on mockups and final acceptance of the reinstalled trim.
For homeowners in North Easton, it’s useful to work with contractors who understand local architecture and the kinds of trim commonly found on older homes in town. We recommend bringing your documentation to the estimate and asking the contractor to walk the specific trim elements you value most so the quote reflects both preservation goals and necessary moisture-control upgrades.
If you’d like to review finished siding examples and different trim outcomes, browse a gallery of completed siding projects for visual comparison and mockup ideas: Siding project gallery. For more on our siding services, including how we sequence installs alongside trim work, see our service overview: Siding repair, replacement and installation. To confirm whether we serve your street, check our North Easton town page: North Easton.
FAQ
Q: Can original wood trim stay on the house while new siding is installed?
A: It depends on the trim’s condition and the extent of sheathing or flashing work required. Small, sound trim can sometimes remain in place if the contractor can integrate flashing and a continuous WRB without disrupting the pieces. For larger upgrades or when sheathing replacement is required, temporary removal is the safer choice to achieve both preservation and proper moisture protection.
Q: How do you protect delicate mouldings during storage?
A: Label each piece, wrap in breathable padding or paper, store pieces flat or on racks in a dry interior space, and avoid plastic that traps moisture. Store long mouldings supported along multiple points to prevent sagging and provide a reinstall map to avoid confusion.
Q: Are there modern materials that closely match historic trim look but require less maintenance?
A: Yes. Cellular PVC and high-quality primed engineered woods can reproduce profiles while resisting rot and insect damage. Replication in these materials can deliver a long service life with less repainting, but careful profiling and finish selection are essential to preserve the original visual depth and shadow lines.
Have questions about your home’s exterior? Boss Services, Inc. can help you consider the next step. Contact our team, call 508-297-0635, or email bossservicesinc@comcast.net.